New Youtube Channel

Now that my home's internet speed is upgraded, I can make more videos!
This is my new channel https://www.youtube.com/channel/UCgW4rIH3Gg6Lc8v4G0QlqgA
Please subscribe!

Monday, May 17, 2010

Swiss Meringue Buttercream


Few months back, when I made Rainbow Piano Cake, there was a request for me to show how I make my buttercream. So, here it is.

Forget about those so called buttercreams at bakeries. They are laden with shortening or margarine. That's why they make your mouth feel so oily, with a waxy, plasticky film all over your tongue. Yucks!!!

But not this buttercream made with real butter.
1. It's light and creamy, and has a wonderful aroma. Almost like whipped dairy cream, slightly heavier in taste and texture. Provided you use fresh butter. Stale unsalted butter smell like Planta or even Dorina. Well, that is one of the reasons I don't consume margarine, I never like the smell and I never knew why. Now I know cos they smell like stale butter. Fresh butter smells like dairy cream, nice and good. This swiss meringue buttercream is not oily in the mouth, but your mixing bowls still need to be cleaned with either hot water or wiped with tissue to ease cleaning.
2. This buttercream also is not sweet like those simple buttercreams where you only beat butter with icing sugar. Ratio of sugar to butter is much lesser than simple buttercream and you can make more icing with this amount of butter than tradtional buttercream. Saves you money.
3. It also holds up well in our room temperature. If you want it to hold up longer, don't beat it too much at step (3), 5-6 minutes will be good. 8-10 minutes you will have a very fluffy icing, but one with less capacity to hold at +30C for long periods of time. My MIL left the cake overnight in the cabinet and the cream was still there, not melted, didn't even budge.

Swiss Meringue Buttercream
Recipe Source: Tartelette

Ingredients:
60gm egg white (about 2 large whites)
100gm sugar
170gm unsalted butter (taken out from fridge and cut into 10-12 small pieces just before you start to heat the egg whites)


Method: (instructions are adapted to tropical weather and hand held mixer)
1. Put the sugar and egg whites in a large heatproof bowl over a saucepan of simmering water and whisk constantly, keeping the mixture over the heat, until it feels hot to the touch, about 3 minutes. The sugar should be dissolved, and the mixture will look like marshmallow cream.
(egg whites in buttercreams are safe for consumption once it reaches 65C, to know how much is 65C w/o a thermometer, just mix 250gm ice with 500ml boiling water. Stir the water gently and wait until all ice has melted, then feel the water. It is approximately there)

2. Pour the mixture into a bowl. Put the bowl into a basin of water. The water should feel cool, like tap water on a rainy day. Do not use very cold water, not icy water. Beat the meringue on medium speed until it cools and forms a thick shiny meringue, about 5 minutes.

3. Now add in add the butter, one tablespoon at a time, beating until smooth. Once all the butter is in, beat in the buttercream on medium-high speed until it is thick and very smooth, 6-10 minutes.

.
Important:

Temperature: If you have a room temperature and humidity like mine, try to add 3-4 pices of ice cubes into the water in step (3) when you add in the butter to prevent the whole mixture's temperature from going too high. The movement of the mixer will heat up the buttercream. Temperature plays an important role whether cream or soup will form. Too cold and the butter can't get fluffy, too hot and you'll get runny soupy cream.

Butter: It must be at 19-23C. Most recipes call for butter to be at room temperature. Yes. But that is non tropical room temperature. Our room temperature can be somewhere 28-37C. So, if you leave your butter to come to our room temperature, failure is not far from grasp. The butter should not be shiny. It should be matte in colour, and you will be able to hold it firmly with your fingers like what you see in the picture and soft enough to be dented thoughout with some pressure.
updated 12/12/14: If you want a whiter outcome, use French butter (Lescure is my fav) or Danish butter (Emborg, Lurpak)

Eggs: Do not use pastuerized eggs. The egg whites won't melt the sugar. I saw this in one blog.. I forgot where.
**Additional notes on eggs : I have tried beating pastuerized egg whites for meringues before. It works. But I haven't tried making buttercream with it yet, as I prefer to go through the heating steps. You have to use 1/4 tsp cream of tartar with each egg white to ensure it whips up beautifully. Pastuerized egg whites are rather 'tightly' bound, so you must use lots of cream of tartar to 'loosen' it. It won't whip to the volume as regular egg whites, which is another reason for me not to use it. The brand I used is SafeEgg, different brands may differ.


This is my 1st attempt pic from The Rainbow Piano Cake post. The first pic above was my 3rd attempt.

So, let me close this post with some buttercream information,

Common types of buttercream
1. Simple buttercream -icing sugar and buter. Less stable in tropical weather.
2. Italian buttercream -sugar and water cooked to soft ball stage, poured over beaten egg whites and then beaten with butter. Very stable
3. Swiss meringue buttercream -egg whites and sugar heated together, then beaten like a meringue and beaten with butter. Stable.
4. French buttercream -method similar to italian buttercream, but yolks are used in place of whites. Less stable

Saturday, May 15, 2010

Baby's Fish Porridge


Ha, I’m so far behind my posting…. Lyanne’s almost 17 months now. Althought she still eats porridge now, but it's no longer a daily affair because she's got her molars now and eating a lot of other stuff.

This is how I do my baby’s fish porridge. And to take away the fishiness, I use spring onions. It adds a lovely touch of sweetness and specks of green in the porridge. I want my children to eat spring onions. I’ve seen so many kids picking that out when they eat out. I don’t want my kids to be like that. You can add carrots of course, but I don’t feed carrots daily to my kids. And I always add sesame oil in fish porridge, masks any fishy smell. *Kitchen Tip*


Kitchen Tip: Use a timer to boil porridge with a slow cooker. This way, there’s no worry of forgetting to switch off that switch when you might be busy with baby. She might be crying or waiting for you to hug her.. and there are times when we really cannot get away for even a while. A kitchen timer really comes in handy.

I do measure my rice with a measurement spoon and use a measuring cup with my water, so that I get precise results each time.
This recipe yields 1 rice bowl of porridge, suitable for 1 feeding of a 9 month old child, Well, this is how much my kids eat at 9 months.

2Tbsp rice
350ml water
30gm fish flesh, preferably, garoupa, threadfin or Spanish mackerel. Please don’t use dory.
1 sprig green onion, separated into white and green parts, finely sliced
¼ tsp sesame oil, good source Omega 6 and masks the fishy smell too.
¼ tsp salt, optional, but I do put a bit. If you like to use ikan bilis in your baby food, they contain salt too.

If you want to increase the rice
3 tbsp, 500ml water, 2 hours
4 Tbsp rice, 600ml water, 2 hours
6 tbsp rice, 750ml water, 2 hours 15 minutes

1. Turn on slow cooker on high. Wash the rice and put in slow cooker. Add in white parts of spring onion too.
2. Boil water and fish. Pour into slow cooker. Put salt if using.
3. Put timer on for 1 hour 45 minutes.
4. When porridge is almost done, put in green parts of spring onion and take out the fish and leave to cool.
5. *Kitchen tip*
Flake fish with fingers, yes, fingers, not a fork. So that you can feel whether there are bones in the fish. You won’t want to choke your child. Feel the fish flakes thoroughly before adding back into porridge.
6. Leave porridge to cool down slightly to warm before feeding your child.

*The fish looks greyish because it's just out from the freezer, it's frost.

Variations that I find to be super yummy, even for an adult 
Chicken and Apple
Cabbage and Pork Loin/chicken
Carrots, Tomato, Onion and chicken/pork loin
Pumpkin and Chicken
Amaranth and fish
Tofu, chicken and wolfberries
Spinach, tofu and fish

I’m not the kind of person that will throw in anything to make porridge. If I feel it’s yucky and won’t eat it, I won’t feed it to my child. And some say, I’m raising picky eaters that only know how to eat good food cos they have me as their mother 

Haha, I won’t know that until much later.

Thursday, May 13, 2010

Seaweed Beancurd Rolls with Ginger Sauce


This recipe caught my eye because I had extra seaweed from my Sushi dinner. I can’t finish the whole pack.

My first time doing real vegetarian stuff. Actually this is called mock fish. But I prefer to call this in its real state. For the first time, something in a local Chinese publication worked for me!!! Right up to the sauce.

Although the original recipe called for black vinegar and I don’t have that, I used Worcestershire which is sour as well. And it did just fine. I added the cornstarch solution at the end because I find the sauce too liquidy. The sauce is really good. Fragrantly ginger, but without the heat on your tongue. Light hint of sourness…just nice. Mother in law said she’ll use the sauce for real fish 

Actually, I only did half of the recipe in the book because the original called for 6 Tbsp of ginger juice. That’s really a lot. So I tried halving everything and see how much gravy I’ve got, and it was just nice. Well, I only doused 60% of the rolls in sauce, cos I left out the ends and some loosely wrapped ones to munch on cos they weren’t that pretty and can’t stand up straight on the plate. So, I f u want to sauce up all the rolls, use the full recipe.


What u will need
3 pieces of Seaweed sheets
Large beancurd sheet (this is pliable even when dry, not the totally dry type. I bought this at a sundry shop. I saw this at Jusco too. Tesco may have this)
cut into pieces slightly bigger than seaweed sheets. 1 large beancurd sheet can make 6 smaller pieces.
9 pieces of soft bean skin rolls (dou bao, 豆包),
Not to be washed, squeezed to remove excess water and marinated with 1 egg, ½ tsp salt, dash of pepper, 1/2 tsp sugar and 1 tsp milk powder. If vegan, omit the egg and milk powder and replace with 1 tsp cornstarch as binding agent.
Edible Glue,
½ Tbsp tapioca starch mixed with 2 tsp water. Bring 80ml water to a boil. Pour boiling water over starch. Mix and u will have edible glue.

How to roll??
1. Lay 1 piece of cut up beancurd sheet and brush all over with glue.
2. Paste seaweed sheet.
3. Arrange 3 pieces of marinated soft bean skin rolls onto seaweed.
4. Roll up tight and apply more glue on ends before finishing up the rolling.
5. Steam on medium heat for 5 minutes and reduce to low heat for 15 minutes. Leave to cool down before cutting up. (You can do until this step, one day in advance and chill in fridge.)
6. Cut rolls into inch long pieces and trim the ends.
7. Deep fry in hot oil until golden brown. Drain on absorbent paper.
8. Arrange rolls on plate and prepare sauce. Pour sauce over and serve.


Ginger Sauce (full recipe)
6 Tbsp pure ginger juice
4 Tbsp sugar (Yes, u need this amount to tone down the heat of the ginger, but still leaving the ginger very fragrant)
2 Tbsp Worcestershire Sauce
2 Tbsp light soy sauce
1 Tbsp sesame oil (original recipe was 2 Tbsp, but to me that seems too much. I used only this amount and it was just nice for me, but if you're using blended sesame oils like Ghee Hiang blue label or Deer brand, use the original amount)
1 tsp cornstarch mixed with 2 Tbsp water
1 Tbsp cooking oil
Mix together everything except cornstarch solution and cooking oil. Heat pan/wok and put in oil. Pour prepared sauce mixture into wok and bring to a boil. Lightly thicken with cornstarch solution.
Pour sauce over beancurd rolls.

Wednesday, May 12, 2010

Honey Ginger Tea 蜜糖姜茶


I'm not feeling good tonight.

Every woman is different. Some feel the pain during, some before. Usually, I feel it, before, but not always. And it's only for a short while. Tonight it came by longer.
Before I was ever pregnant, the signs will come exactly 2 days before and after I've had children, it's no longer consistent, and having 2 kids so near has made me forgotten how these days feel like.

So, I made myself a cup of ginger tea, sweetened with honey to make it more palatable. I love ginger, so I don't find it difficult, even if I need to drink a lot of this.


2 inches of ginger, skin on and sliced thickly and smashed.
slightly more than 1 cup water
1 Tbsp honey

Put ginger and water in a small saucepan. Bring to a boil and simmer on low heat for 5 minutes.
Pour tea into a cup and put in honey to sweeten.

Good for days like this :)

Husbands or sons, if you see your wife or mother not feeling good, try to make her this to make her feel better.


Tuesday, May 11, 2010

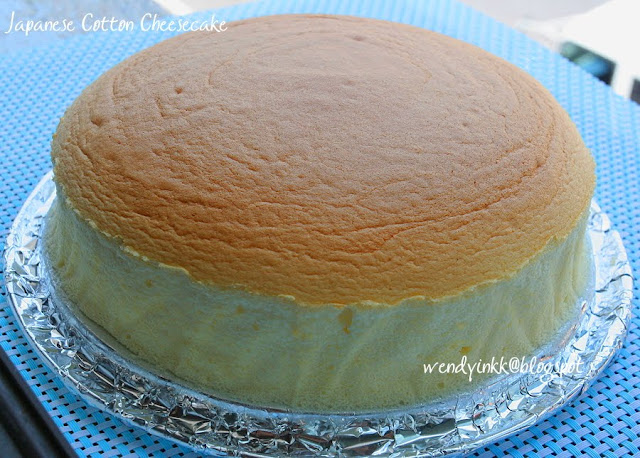
Japanese Cotton Cheesecake with Fresh Fruit Topping


My mother in law is back to the States... just few days back. Can't wait for her return, so that I can get more stuff :) 
And the night before she left, we had a simple Mother's Day celebration at PhongMun Restaurant Sg. Siput.
Ate 6 dishes and a cheesecake for dessert.

I knew she loves fruits, and cakes with fruits will be a lovely choice for her. And she has told me before she don't like canned peaches. I don't want to make a vanilla sponge to go with the fruits, that will be so ordinary. So, I thought and thought, what should I do for the base? Oreo Crust with no bake oreo cheesecake, or oreo crust with baked cheesecake, or sponge (Duh!!!! ). Baked or no baked oreo cheesecake will be too heavy for Mike's family who are not fond of desserts right after meals. And then I saw on Blessed Homemaker's , she made a Japanese Cheesecake. Yeah, that type of cheesecake will not be heavy, but nice enough not be boring. So, I took out my favourite cheesecake cookbook and tadah!!! There is the recipe and I have everything on hand.

Adapted from Alex Goh's Fantastic Cheesecake.
I didn't want to do it in 2 ovals, so I only made 75% of it and did it in a 8 inch round. I got a 2.5inch cake in the middle and a 2 inch on the sides and that's after it has shrunk. Oh yes, this cake will shrink, Alex said it will and it did, so don't fret about it being shorter than when it was fresh out from the oven.

Japanese Cotton Cheesecake Recipe
125gm cream cheese
90ml milk
15gm butter

30gm flour
24gm cornstarch
3 egg yolks

3 egg whites
pinch of salt
1/8 tsp cream of tartar
75gm sugar

Topping:
1/2 tsp gelatin
1 Tbsp water
150ml whipping cream
2 tbsp sugar
Mixed fresh fruits, mango, strawberries, kiwifruit and blueberries
1 Tbsp instant jelly
100ml water
1 tbsp sugar

1. In a heavy saucepan, cook cream cheese, milk and butter until thick and smooth. Set aside.
2. Preheat oven at 160C. Boil some water.
3. After the cheese mixture has turned warm and mix in both flours. Stir with a whisk until smooth.
4. Put egg yolks into the cheese mixture and stir until well combined.
5. In another clean bowl, beat egg whites (+ salt) until frothy. Put in cream of tartar and beat until soft peaks, add in sugar gradually and beat until stiff (soft droopy peak that will hold its form).
6. Fold 1/4 of egg whites into cheese mixture, and then another 1/4 of the egg whites.
7. Pour the cheese mixture into the remaining egg whites and fold.
8. Pour batter into a lined pan (you can just line the base and grease the sides, it's not a must to line the sides as well. Springform or regular pan will be fine, but spring form's base must be wrapped.)
9. Place cake pan into a slightly bigger, shallower pan. Fill the bigger pan with boiling water and put in oven to bake at 150C for 45 minutes.
10. Unmould cake immediately upon removal from oven, if not, the cake will shrink a lot. (If you're using a regular pan you can release the sides by running a knife between the cake and pan, and leave the cake in the pan to cool down).

To make topping
1. Put water into a heatproof bowl. Sprinkle gelatin onto water. Wait for 2 minutes. Either heat it by double boiling or zap it in the microwave on high for 25 seconds. Leave gelatin mixture to cool down totally.
2. Freeze mixing bowl and beaters for 5 minutes. Remove mixing bowl and pour in cold whipping cream.
3. Beat whipping cream until visible streams can be seen. Pour in cooled gelatin mixture and sugar and beat until stiff peaks. Do not overbeat.
4. Mound whipping cream onto cooled cake. Top with diced mixed fruits. Chill cake in freezer for 10 minutes while you make the jelly topping.
5. Put water and sugar into a small saucepan, on medium heat, bring to a boil. Put in instant jelly powder and stir until fully dissolved.
6. Remove cake from freezer and glaze fruits with instant jelly solution. The jelly will firm up upon contact with the cold fruits.
7. Return cake to fridge and chill for another 2 hours before serving.


Verdict: Mother in Law was happy to see the cake and took pictures of it. She loved the cake, saying that it was cheezy but light. The cream with fruits add a nice touch to it. Everybody who ate this cake, although full with rice, still found this cake to be nice. Hehehe... sometimes when things only seem tasty when you are hungry, it might not be tasty at all, just because you are hungry. But when things still seem tasty when you are full, you can guess how nice it is :)


Cheesecake

Printfriendly

Related Posts Plugin for WordPress, Blogger...