New Youtube Channel

Now that my home's internet speed is upgraded, I can make more videos!
This is my new channel https://www.youtube.com/channel/UCgW4rIH3Gg6Lc8v4G0QlqgA
Please subscribe!

Showing posts with label Step by Step Pics. Show all posts

Monday, July 2, 2012

Sweet Orange Marmalade - Let's Jam # 1


I love the smell of oranges and all things citrus. But I hate it when it’s bitter. Store bought marmalade are always bitter, unless you buy orange jam.

Err.. orange jam and marmalade . Aren’t they the same stuff?

Well, marmalade is JAM with fruit peel in it. And it’s the peel that causes it to be bitter, which is why you can hardly get non bitter marmalade, except for Smuckers or some other brand that I don’t know of. Maybe they have something to remove the limonin from the peel. I wonder if rubbing the peel with salt do the trick of removing the bitter compounds(limonin)? I’m wondering. Wait, I’ll try that next time. : )

Friday, May 25, 2012

Guangxi Rice Dumplings (zongzi) 广西粽子 - Wrapped # 3


As you all may know, my mom is a KwongSai (Guangxi).

My first endeavour making rice dumplings was when I was about 15. I was very excited and this was my first time doing so. No one in the house made rice dumplings ever since grandaunt last did it. No one knew how to do it actually, or would bother to do it because it is considered something very troublesome.

Monday, May 21, 2012

Pot Stickers / Guotie - Wrapped # 1


Recipe recreated in July 2011

I first learnt to make these when I was 13 or 14. I forgot exactly when.

My friend, LSP's mom is a Taiwanese. She doesn't call these pot stickers, but instead as ShuiJiao.
To celebrate LSP's birthday, her mom, Mrs Loh organized a "ShuiJiao" session at her home. A few of us were invited over to make your own and eat your own dumplings. Since it was a first for most of us, we made the skin thick and fillings miniscule. LOL. Kids!

Monday, November 14, 2011

Friday, October 21, 2011

Kuih Tako - Kuih Week # 3

Recipe recreated in September 2011

One of my favourites. If you have an big bush of pandan and don't know how to use it up, make this. This kuih needs a lot of pandan leaves. I made this because I was given a lot of it by Mike's aunt. Well, besides that you can also cut up the pandan and use as cabinet deodorizers, it prevents pesky cockcroaches. Not a must to make edible things with pandan.

Friday, August 19, 2011

Steamed Flax Seed Milk Flower Rolls 亚麻子花卷 - Steamed Buns # 3


Flax seeds are nutritious. According to Wikipedia, besides being high in fibre and omega-3 fatty acids, it also helps to lower cholesterol and benefits those who are having breast and prostrate cancer. If you're diabetic, it's also good for you because it helps by stabilizing your blood sugar. But take this with caution if you are on oral medication. It's high fibre content may interrupt with the medication and you must drink lots of water whenever you take flax seeds, if not you may end up with intestinal blockage.

Wednesday, August 17, 2011

Purple Sweet Potato Rose Mantou - Steamed Buns # 2


25/6/2019 Updated: New Instructional Video below recipe

I've been looking for new ways to form my steamed buns or mantou and this is one of them.

If you want to make a heartfelt low cost present for your loved one, try making this and form it into a bouquet. Every bite of it sure comes full with sincerity and bliss :p

Wednesday, July 6, 2011

Pickled Papaya - Full Moon # 2


One of the favs of full moon!!

Some look forward to pork trotters vinegar. Some look forward to turmeric rice with curry chicken. Some look forward to pickled young ginger. But most look forward to pickled papaya.

I guess pickled papaya is a local full moon fare. I don't think in China this is served. Do papayas grow there? I don't know, but it's like anywhere and everywhere here (besides in the concrete jungle of course). Throw some seeds onto the ground and few months later, you can pick papayas off the tree. They're one of the cheapest fruits around.

Monday, July 4, 2011

Pickled Young Ginger - Full Moon # 1


One of the must haves for Full Moon. The only ginger that my hubby likes. He is a ginger hater, but he loves pickled ginger.

It sounds easy to make pickled ginger. But it's not easy to make nice tasting pickled ginger. I've tasted quite a lot of not so nice ones before. Either too salty, too fiery, or not sourish enough or not enough sugar. One must be daring enough to put in vinegar and sugar. Not enough of either and the ginger taste somewhat off balanced. And the process is important too, and if not, the ginger will be too fiery.

Friday, January 21, 2011

The Best Melt in the Mouth Pineapple Tarts (enclosed version)


This is not a recipe for someone who is weight conscious. Fattening cookie ahead!! Warning!!! Do not proceed if you are on a diet.

I haven't been baking pineapple tarts for 5 years. This year I came out from pineapple tart hibernation. It's not because I was sick of it, but I don't like making the same cookies each year. Last year, I didn't make any cookies at all, besides frying arrowhead chips. And this year I didn't fry any, and won't be planning to fry any. There're lots of other things to eat besides cookies and how much can one's stomach take in. Kekekeke. I'd save the space for good stuff, like prawns, abalone, bla bla bla bla bla......

I’ve seen this recipe many many years ago, during my early years of blogging. I saw it on many blogs then, but not now. Never seen it since 2006. Many of those blogs who tried this recipe are no longer active. And those who tried this recipe all found it lip smacking delicious, one even wanted to spank the recipe source, Josh. Hahaha. I've been KIVing this recipe for so so long, and I finally tried it out this year.

When I looked at the recipe, gosh: Butter, Cream Cheese, Whipping cream, egg yolks. How can this recipe not be soft and melty? And I read through the forum where this recipe was posted. I anticipated a soft sticky dough that will be hard to manage. I’ve never made enclosed versions before, so this is my maiden attempt.

When I mixed the dough, it was indeed very very soft. Looks like a cake batter, but a thicker one. So I quickly turned on all the airconds in my living room. With a lower room temperature, the dough will be easier to shape. That was my assumption.

See, it’s like cake batter, but it’s not sticky. Tested before the air-cond was on.


After I prepared the dough, I let the dough sit. It helps to make it more manageable rather than shaping it straightaway. During this time, I rolled my homemade pineapple jam. They are rolled into tiny balls, as big as a 10 sen, about 1cm diameter only. The amount of jam I made was slightly more for this amount of dough. The extra can be used for spreading on bread or other bakes. Keep them chilled while you prepare the dough balls. Cold jam helps with the wrapping process. They are more "solid" when cold.


Then I made balls of dough, double the size of the jam.


And I wrapped them up. Quite slow in the beginning, but picked up pace as I got the hang of it.


See my wrapped up tarts? Roll them round and nice.


After that I preheated the oven at 160(fan)/180C and made marks on my cookies. Brushed with egg yolk and baked them for 20 minutes. The recipe says 15 minutes, but I find they look nicer with 20 minutes. If I baked them at 180C in my convection oven, it takes 15 mins, yeah, but the colour is not that even, top is browner. So, I prefer to go lower and longer for a nicer finish.

These were baked at 160(fan) C for 20mins, whereas those in first pic were baked at 180C for 15 mins.

Notes to take note:
1. Wrap with clean hands. If your hands touch the jam too much, it’ll cause ur fingers to be sticky, and the wrapping process will be sticky. Wash it from time to time, or just try to keep one hand dirty with jam, not both hands.
2. Do not handle the dough too long. Wrap it as quick as u can.
3. You can push the dough to wrap around the jam, no need to roll it big and huge before you wrap. It’s soft enough to be pushed around the jam. More trapped air means high chances of cracked tarts.
4. Turn the air conditioning on. It helps. I just put it at 25C. Just make sure the room is not too hot, as in above 30C. I didn't even put the dough into the fridge halfway shaping.

Oh yeah, the ingredients, kekeke. Here’s the list of it and method to prepare the dough.

Melt in the Mouth Pineapple Tarts
Source: Gan55/Josh
Makes 125 pieces of tarts the size of Penang's dragon ball biscuit

250gm butter (salted), please don't use Buttercup, Butterblend or Farmcows, it's not real butter
75gm caster sugar
170gm cream (I used whipping cream, dairy of course!)
50gm cream cheese
3 egg yolks
400gm cake flour
30gm corn starch

One more yolk for glazing
Homemade pineapple jam from 2 large Morris pineapples

1. Cream butter, sugar and cream cheese together.
2. When it comes together, pour in cream and whip on medium speed (I used speed 2 on my hand mixer) for 10 minutes. Scrape the sides from time to time. It may look lumpy, don’t worry, later it’ll turn all creamy.
3. Beat in egg yolks for 1 minute.
4. Sift both flours and pour half of it into buttery mixture. Mix on low speed until it comes together and pour in the remaining flour and beat until it comes together. Do not over mix.
5. Let dough sit for 10 minutes minimum before you start wrapping your jam with it. Method, please scroll up :p

Verdict:
Gosh, this got to be the best enclosed tart ever. This is my maiden attempt in making enclosed tarts, but I've eaten lots of enclosed tarts and handled lots of different doughs before. Compared to cornstarch laden enclosed tarts, this is a clear winner. It’s not very fragile. It doesn’t crumble in your hands that easily compared to cornstarch or custard powder ones, but the way it melts in your mouth and not in your hands is truly delicious. I’ve eaten tarts fresh from the oven, and usually they are slightly crispy, and one needs to wait one or 2 days for it to turn soft and crumbly. Not this one. It’s melty the moment it’s out from the oven, melty but not fragile. I could just easily arrange them in the containers. It's due to the liquid cream added, the "fat" emulsion helped the dough to be more sturdy but yet remain soft and flaky. Better in terms of handling (very slightly elastic when raw, this helps with the wrapping and sturdy when baked) compared to recipes that uses loads and loads of butter. And the cream cheese added a beautiful dimension to the taste and texture. Lyanne even shook one container but they stayed complete, not broken nor shattered. Just bits of crumbs stuck to the side of the container, but remained whole and no one will notice if you clean the container later. My mom after tasting one piece demanded that I make more of this. Hahahaha. That is a command from Mommy dearest, my biggest fan.

This will the recipe that I will stick to the rest of my life, if I'm making enclosed tarts. There's no need to search for another when I've already found the best.


The real size is about 30% smaller than those in these 2 pictures
Lyanne shook these, see they're still whole!! But the egg glaze was "traumatized" by her shaking.


Yummy! Will be making a double batch in few days time.
I just cooked 4 large Morrises, by Mommy's demand.


This post cannot display anymore comments, due to my template's restriction.
May I suggest that you read through all the comments as I might have answered the same questions before.

FAQ:
1. How long will the cookie last: I kept it few weeks before.
2. How come the base is flattened or distorted : Jam too moist
3. Dairy whipping cream can be found at the same aisle with fresh milk and cheese and it's not the spray type. Fat content 35%. Non dairy cream is not recommended
4. Sometimes our weighing equipment could be a bit off, or the weather is too humid and the dough turns a little stickier than seen in the picture. You can add a bit extra flour, but it should not exceed 2 Tbsp. Just add until you can touch it with a clean finger and comes off clean.

More questions can be asked here on my FB. Thank you :)


Thursday, January 20, 2011

Homemade Pineapple Jam

When I was a teen, right after my SPM (which is something like middle school examination, or O’levels), I made and sold pineapple tarts to earn some pocket money instead of slaving away at local supermarkets.

That time, I didn’t even think of selling my tarts, but then word got out after a few tasted my tarts and came asking whether I want to make these for sale. I gave it some thought and said, ok. My tarts were sold for 100pcs/RM12 (don’t worry, still made good profit from it). My tarts were open faced, weren’t big, but still, dirt cheap. I know, but that was like 15 years ago. Haha, now u can guess my age, right? But even that, there were some who said my tarts were expensive(mostly women in their 40’s trying to press a teen for price). But some said, how could I ever charge a cookie that needs 3 layers of job that cheap(tart, jam, lattice deco). And those who said that were men, men in the renovation and construction line, customers of my family’s coffee shop. Because when they quote their customers for reno works, it depends on how complicated the job is, and when they look at my cookie, even though they can’t cook nor bake, they’d scream “complication”!!


I made my jam from scratch, I don’t buy. I tried buying once, 5 years back, and my family told me never to buy pineapple jam. NEVER AGAIN. The store(BWY) bought jam smelled of pineapple essence. Not something that we can accept because we are so used to real jam. Well, can’t blame the manufacturers. The fibre used in the jam, might be remnants from the pineapple juicing and canning industry where it is almost tasteless by then, so the extra flavouring is inevitable. There is one cookie stall in Klang Valley’s shopping centres, Shazz Delight who used to make quite nice pineapple tarts, but once they changed their filling to stuff that reeks of pineapple essence, that was it. I no longer purchased another box from them. Before that, I was a regular customer. Call me picky. Yes I am.

Cooking 16 pineapples at one time was my record. I didn’t peel every fruit. Actually I never did until recent years when I no longer stayed at my hometown. I paid 50 sen extra to the fruit seller to have them peeled. Well, for professionals, it’s easy peasy. They’d get the job done in just a fraction of the time. That time one pineapple was sold for RM1.20, and 50 sen for peeling, seemed like 45% extra profit from the fruit. The 50 sen seemed little in amount, but substantial by percentage. I didn’t mind it at all. Even if they want to charge me RM1 to peel each fruit, I’d pay too, but of course, I just kept quiet. Hahahahaha!! And I didn’t cook all the jam, 16 fruits in one big wok. I’d cook 4 first, let the jam reduce, then add more, adding as it reduces. Needs good bicep work to get the jam stirred.

Now if you ask me, what varieties of pineapples work best?

I’d say Morris. Morris is the most common pineapple around. Fruit vendors may not call it Morris, but maybe call it, the “usual pineapple”. Please bear in mind that, here, they don’t even call green apples as “granny smiths” but just green apple. So, don’t think that they might know what you are talking about if you ever ask them about Morris. Fruit vendors here are mostly proficient only in Durian varieties, haha!


Why Morris?
1. It’s big and cheap (this year I bought each fruit for RM2)
2. It’s very fibrous
3. It’s tart (sourish), doesn’t taste sweet

Pineapple jam is all about fibre. How much jam you’d get depends on how much fibre the fruit has. I’d never go for a sweet eating pineapple like Josapine(not Josephine ok, no such pineapple exists) to make this jam. Because sweet eating pineapples are more juicy and has less fibre. I don't think you'd use fuji apple to make your apple cake, but use green tart baking apples instead, right?  I won’t go for ripe Morris too. Ripe ones are juicier and of course, less of the crucial stuff. The more under ripe they are, the more I love them. Simply because you can add more sugar. Crazy woman, why use more sugar, isn’t less much better???? Sugar is a preservative. If you want your jam to last, make sure you use lots of sugar. Tart pineapples allow you to use lots of sugar without tasting overly sweet. My cookies were known to last for months, and not a mould or fungus in sight! My friend kept a box of my tarts in her cupboard for almost 4 months and forgot about it. And it was still fine after the 4 months. And I’ve seen some pineapple tarts getting mouldy by the 15th day of CNY. Yucks!!!! So I won’t be trading sugar with fungus. No Way.

If you want to ask me,

Can I reduce the sugar?
If you can be sure your tarts are eaten within 1 week, u may. I won’t take risks. Anyway, mine is still LESS sweet and sticky than store bought ones.

Can I omit the cinnamon?
Cinnamon is a natural antimicrobial spice. It helps in food preservation. Omit if you want, but I won’t.

Can I drain the juice before cooking so that it cooks faster?
You may if you prefer jam with less flavour. The juice has tons of flavour in it. I’d never do that.


So, here's what you need to make pineapple jam, my version.

2 large Morris pineapples* (about 1.6kg each fruit before peeling, after peeling it’s about 900gm each)
2 cups sugar (400gm)
1 smallish cinnamon stick

Basically it's 20% sugar.
Weigh your cleaned pineapple and calculate the sugar needed.
If you go by volume, then for every 4 cups of pineapple puree, use 1 cup of sugar.

*Take note that hypermarket's Morris's are smaller than those at the wet market

Method:
1. Peel the pineapples. Method found in this post
2. Cut pineapples into chunks. DO NOT DISCARD THE CORE. That part has the most of the precious fibre.
3. Put half the pineapple chunks into a blender, add 1/3 cup of water and blitz away.** Pour 80% of the blended stuff into a pan or wok (please, no pot, you need a large evaporation surface)
4. With the remaining blended pineapple in the blender, repeat blending process with the rest of the pineapples, always leaving some blended stuff in the blender if you need to blend more chunks and you won't need more water.

**If you worry about the core not being fine enough, separate the core from the soft flesh and blend the core until it's very fine. There's a lot of fibre there.


5. Cook pineapple paste with cinnamon stick on medium heat until it's very pasty, like thick oatmeal. I don't stir it all the time, see notes below.
6. Add in sugar, it'll turn watery again. Turn to lower medium heat, and cook until it is very pasty. Stir once a while only, but keep an eye on it. See notes below.


7. Increase the heat to high. Don't stir and let the base take on some colour. It will caramelize the jam. Stir once a while to check on the colour. Stop when it almost reaches your prefered colour. Take note that some pans will continue to caramelize even when the heat is off.


Important Notes:
1. Add sugar in after the pineapple paste has lost more than 80% of its water. It reduces the risk of burnt jam and the most importantly, it splatters horribly when there is a lot of water with the large amount of sugar.
2. Do not stir often when you reduce the pineapple paste. Once you stir, it starts splattering again, even with no sugar. When it doesn't contain sugar, it doesn't burn that easily. Stirring once a while is fine, just keep an eye on it. I let it cook and surf the net, checking it every 5 minutes. Splattering is no fun, it's very very hot and the burns are horrible.
3. Use a heavy based pan to do it, if you can. It reduces the risk of burning the jam, drastically. But if you use a regular wok/pan, then you need to stir it more often and you face a higher risk of getting hurt by the splattering.
4. Wear kitchen mittens when you stir to prevent the splatters from hitting ur hand and wrist. It can splatter up to my kitchen hood. No joke! So, don't lean forward to look at the jam. Your pretty face will be at risk. CNY is coming, you will want to look your best.
5. Take note that the jam will thicken further upon cooling. It's best to undercook rather than to overcook the jam. You can cool it and see the texture. If it's too wet, you can cook it again to dry it, but if it's way too dry after cooling, you can only dilute it by cooking another pineapple (with sugar) and adding the too dry paste into it. Adding water might ruin the sugar formation in the dry paste and cause it not to last long.
6. If you want to cook more than 2 pineapples, do not cook all at once. Pour in paste from one fruit into the pan/wok and let it reduce. While it reduces, prepare the next fruit and pour in when it's almost dry. This way, it reduces much faster than cooking all at once, and you save time too. Preparing while cooking, rather than prepare all and cook. Just go by the ration of one large Morris with 1 cup sugar and it'll work fine.
7. If you have a kitchen hood, turn it on. Even though it's not smelly or oily, the exhaust will help with the evaporation. You want it to be quicker, right?

This was all that I got from 2 large pineapples.
A lot of work, but definately worth it.
Lydia even requested the jam to go with bread.


Friday, December 17, 2010

Candied Coconut - White sugar version


I made candied coconut with gula melaka (palm sugar) way back in 2008. I was very very satisfied with the result. So, with another blogger meet-up coming up (I'm the last to blog about it, so I'll not go into the details, you can read about it at Sonia's, Swee San's, Reese's and Pei Lin's), it's a good chance for me to make this again, since making too little is a bit too wasteful and too much for personal comsumption is not a good idea :)
Good things are meant to be shared, HAHAHAHAH!! Don't ever get fat alone, LOL.


So, you must be wondering, where did I get my coconut flesh.
From the wet market!!

*
Long ago(20 yrs ago), we could only buy grated coconut from the market.
*
Sometime back then (about 15 yrs ago) , we could buy freshly squeezed coconut milk from the market, and it's made with coconuts that were halved and grated by holding the coconut halves against the electric grater, then the grated coconut is poured into a machine to get the milk out.
*
The latest : You won't find the electric grater with a sharp ball and a upright basin at the wet market.
What you will see is a grater that works like a paper shredder. Put the whole pieces of flesh in the upright feeding hole, and what comes out is finely grated coconut. Then the grated coconut is then poured into the extrator and milk comes out :) The latest method is a lot lot faster!
*

So, what does this has to do with where to get the coconut flesh pieces???
The answer is, get your coconut flesh pieces from the coconut milk vendor before they turn it into grated coconut. LOL. Sorry just being a bad joker here.


This time, I made 2 versions, the old palm sugar version and I tried out the old fashioned white sugar version.


Recipe is pretty easy

Just keep the ratio of sugar to coconut, 1: 2 and you'll be fine. Means, if you used 1kg coconut flesh, use 500gm sugar. And I mean cleaned peeled coconut. Not the initial weight that you bought from the market. Last time I used the weight I bought and ended up with too much sugar in the pot, a bit wasted.

So, here's how


Cook on medium heat until the whole pot of coconut looks watery and reduce to low heat to cook until totally dry. Stir and toss with chopsticks not spoon. Stirring is only needed occasionally until it looks almost dry, then it has to be all the time.

So, here's how the white one looks like immediately after cooking. Pretty dry right? And nope, the base is not burnt.

Not too difficult right?


And one thing, I want to share with you.
If you think that you want to buy the purest and best gula melaka to make this snack, DO NOT DO THAT!

The one above is the latest and the one below was done in 2008

Can you see the difference of my latest attempt with the old one?
One looks dry and one looks clumpy with sugar.
Last time, I used those light coloured palm sugar (light brown not Thai milky coloured ones), which are a lot less pure(made with added white sugar) and are harder.
Pure ones are soft and moist, crumbly when pressed and definately needs refrigeration, if not it'll sweat.
Using pure ones is a bad decision.
I forgot that raw sugars like this are acidic, and when it's acidic, the sugar won't dry properly and stayed in clumps. So in times like these, better buy the less pure stuff so that you can have dry dry coconut, not clumpy ones.


And if you're wondering what am I wearing in that pic? Looks frumpy... Well, it's a maternity dress.
Yes, I am almost 4 month preggers now and the baby's due early June.
I haven't been cooking or baking since early October (unless I have no choice), up until 2 days before the lastest blogger meet (just last week), and yeah, the blog is running with no baking and cooking in my kitchen and it could still run with daily posts until March, yes it's that crazy.
Baking and cooking mojo has been on super low gear during the 1st trimester and I'm glad it's back now.

But I won't be on high gear til very much later, I'm busy busy busy now, and hopefully by Jan, I'll be moving into my new house with a new oven and a few more new toys.

Wednesday, December 15, 2010

Tub Tim Grob, Rubies in Coconut Milk Dessert


This is one dessert that you can use to wow your guest. The look of the water chestnuts look spectacular and when served in fancy glasses, they really do look nice. A red dessert looks good if you’re wearing black. Accessorizing!!! Hahaha. Red rubies they may be, but not wearable.

This is not my maiden attempt with the famous Thai dessert. I first tried making this a decade ago when I was staying with my chummies. They loved it, but I wasn’t all that successful cos the starch wasn’t sticking well to the water chestnuts. Then lately I read from the net that it’s spraying that makes the 2nd layer of starch adhere well and that’s how you make the starch really thick.I had some water chestnuts in the fridge, originally intended for a soup, but heck, what was I waiting for? Waiting for the day I could get jackfruit!!! Finally Saturday came, and I could get some from the local farmer’s market. This dessert will taste weird to me without jackfruit, cos it’s this sweet yellow flesh fruit that gives the dessert the super aroma.

Actually, in Ipoh, one can easily get this from the main wet market. It’s called “pomegranate seeds, 石榴子” instead. And it doesn’t come cheap. More than 15 years ago, I knew it was RM3/pack, about 1 cup’s amount with water!!! So, why not make this yourself. The instructions I give may seem long, but once you get the hang of it, it’s really easy peasy.


If you are serving this at a party, you can make this in advance, so, no rushing here and there on the day itself. You can make the coconut smoothie and freeze, and the red rubies can be made 1-2 days in advance (those sold can be kept for 2-3 days in the fridge)

Tub Tim Grob
Recipe source : Wendyywy
Serves 6-8

(A)
6 water chestnuts
½ tsp red food colouring (I prefer artificial cochineal here, which is slightly pinkish purplish, rather than red) or some beet root juice
1 tsp water (no need if beet root juice)
1 cup or more tapioca starch (Cornstarch will not be suitable)
Few pieces of jackfruit flesh, thinly sliced

(B)
125gm sugar
125gm water
1 pandan leaf, shredded and knotted

(C )
200ml thick coconut milk
750gm ice cubes

Method
1. To make syrup, bring B to a boil on medium heat, let it simmer for 2 minutes. Turn off the fire and let it cool down.
2. While waiting for the syrup to cool down, peel and cut the water chestnuts into 5mm cubes.
3. Mix food colouring with water and mix food colouring to the cut water chestnuts.


4. Put tapioca starch into a large bowl/basin. Pour all the dyed water chestnuts onto the starch.
5. Toss the basin/bowl so that the chestnuts will be evenly coated with the starch. Do not use a spoon to do this, but toss the whole basin.
6. Prepare a colander (not sieve) in another basin/plate. Pour all the water chestnuts and starch into colander and sift to separate extra starch from the coated water chestnuts. Remember to use the basin to collect extra starch.

7. Pour water chestnuts into a plate. Spread it out and lightly spray with water to moisten the water chestnuts. Toss and spray again. Repeat until you see the surface looks moistened but not wet.
8. Pour water chestnuts back into collected starch and toss and sift again. If you want a thicker layer of starch, repeat the spraying and tossing in flour again.

9. Let starch coated water chestnuts sit for half an hour. (So that the outer layer of starch may absorb moisture from the water chestnuts, it will stick better**)
10. Meanwhile, prepare coconut smoothie. Pour half the ice, half the syrup and half the coconut milk into a blender, and whizz til fine. Pour coconut smoothie into a freezable container. Repeat whizzing with balance of ice, syrup and coconut milk. Put coconut smoothie into freezer while you do the rest.

11. Bring a pot of water to boil. Prepare a big bowl of ice water.
12. Pour in all the coated water chestnuts, stir gently immediately for a while so that the chestnuts will not clump together and let it boil on high heat for 1 minute.
13. Remove water chestnuts from boiling water by using a slotted skimmer and put into ice water immediately.

14. Let it sit in the ice water for 10 minutes or longer.*** Stirring gently once a while to break up the "rubies"
15. Meanwhile, slice the jack fruit.
16. To serve, put some coconut smoothie into serving bowl, top with sliced jackfruit and "rubies". Serve immediately.


** I made this twice in a day. The first trial, by the time I wanted to boil the chestnuts, the gas ran out. So I called for gas and it arrived half an hour later. My 2nd batch, coated with starch 3 times were boiled immediately after the 3rd sifting. Comparatively, the 1st batch had a nicer starch coating, although it was only floured twice. Then I came to think of it, yeah, letting it sit for a while will make the moisture seep out and make the tapioca starch stick better to the water chestnut.

*** I also found that by letting it sit longer in ice water, the starch expands to wrap the chestnut better. No wonder those sold in Ipoh looked so thick with starch. They were sold in water filled packs, like cendol.


Tuesday, October 12, 2010

Steamed Flower Bowl Tofu


I saw this type of steamed dish quite often on China's sites.There are many variations, some serve it with sharkfins, some in superior broth, and some with noodles. It is actually called "Steamed 3 Silk", or 扣三丝

After lining the base of the bowl with the "silk" They just stuffed extra  silk (egg, hams, mushrooms or whatver) into the bowl cavity to steam. Instead I used tofu as the filling. And I used egg as the tofu's binder.
Sigh, the egg might be a wrong decision, as you can see, the egg has covered up most of the "flower".

Anyway, I quite like this dish.


70gm ham
3 filament crab sticks
1 egg, fried into a thin ommelete
1 Chinese Black Mushroom, soaked
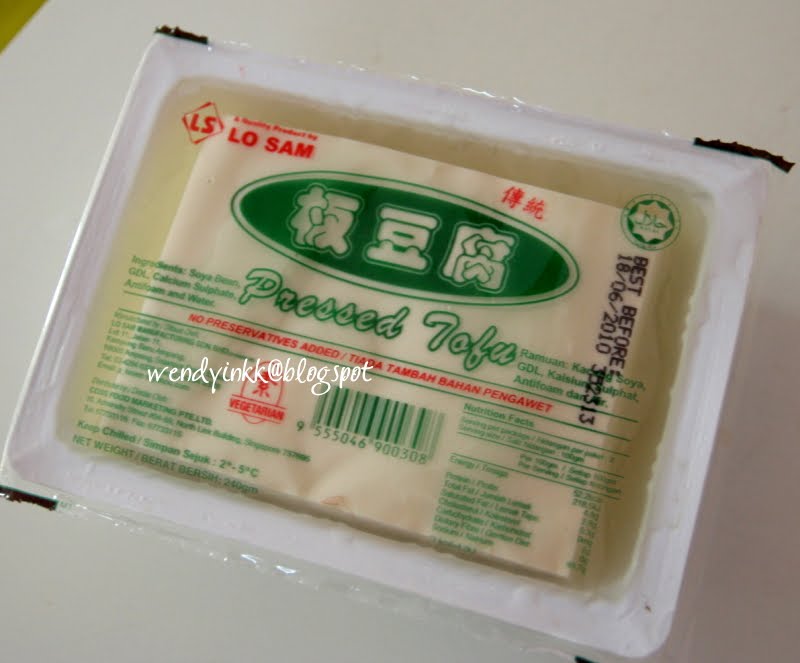
240gm pressed tofu (firm tofu)
1 egg
½ tsp salt
Dash of pepper

1. Cut ham, crab sticks and ommelette into long thin matchsticks
2. Line a heatproof bowl with heat proof cling wap.
3. Put mushroom on base of bowl, cap side down.
4. Arrange ham, crab stick and egg strips in bowl.
5. Mix tofu with egg, salt and pepper.
6. Pour tofu mixture into bowl and steam on high heat for 5 minutes and medium heat for 15 minutes.


Monday, August 9, 2010

How to Peel a Pineapple


Remember Cheezels??? That's how you eat Cheezels, stick your finger through the hole. But this is a pineapple. that's a bit to big. Hahaha!!

When I made Pineapple Tarts for sale back when I was 17, I never peel my own pineapples. I pay extra 50 sen (for each fruit) to have it done. It's not easy to peel 10 pineapples each time I make the jam. And I make that a few times. I'd rather pay. But now, I only need one... So, I tried peeling this myself. My first attempt. Hahahah!!
I'm going to do another upside down cake, since I was dissapointed last time.

So before I bake the cakes again, here goes my peeling adventure..


 Wonder why the numbers are not quite right with this 2nd peeling pic? Cos I missed those in the middle out during my initital editing, so I just quickly remedied it... haiya, nevermind la. Not perfect nevermind one.

Now, I can peel my own pineapple already. Can you? I'm sure you can.

Oh ya, one more thing about pineapples. I always bake with Morris variety. Huh? What what???
There are a few varieties of pineapple in Malaysia, and the common ones in the market are Morris, Josapine(not Josephine ok, no such pineapple), and Sarawak variety, with Morris being almost everywhere. It's at the rojak stalls, the cut fruit stalls, the juice stations.. Why? It's the cheapest!!!

Well, it's not because of the price that I use this, but because of the taste. I'm sure you won't want to bake with red apples, but green ones. Why? Things that are too sweet don't really taste that good when baked, right? I like Morris, due to the tartness, the amount of fibre it has (especially when it comes to pineapple tarts, the more fibre, the more jam I'll get from 1 fruit). Josapine is more of a eating pineapple than a baking one, that's my personal opinion., but then again, I don't eat fresh pineapples. Maybe due to bad experiences of them making my tongue sore when I was a kid, and they were Morris :)

Ok ok, enough said, check out my 2nd upside down pineapple cake 2 days later.

Printfriendly

Related Posts Plugin for WordPress, Blogger...