New Youtube Channel

Now that my home's internet speed is upgraded, I can make more videos!
This is my new channel https://www.youtube.com/channel/UCgW4rIH3Gg6Lc8v4G0QlqgA
Please subscribe!

Showing posts with label vege-leafy. Show all posts

Friday, October 18, 2013

Cabbage Salad with Chuka-fu Dressing - Easy Japanese Fare #3


About 10 years ago, when I was still in Klang Valley, I frequent this Japanese eatery Ryu Men Tei in Subang Jaya on a weekly basis. I have roughly eaten about 90% of what is on their menu. My then bf, now husband, loves the restaurant as well. The restaurant was always packed, even on weekdays.

Monday, June 3, 2013

Acar Awak - MFF Penang #2


I love acar  awak.

The one I grew up eating was similar to the one by Rasa Malaysia, that is vegetarian with no belacan and dried shrimp, and consist of only the basic 5 vegetables. I couldn't decide on an exact recipe to follow because a lot of recipes do differ from one to another, but the basic idea is the same, hot and sourish pickled vegetables with lots of peanuts and sesame.


Friday, February 1, 2013

Pickled Cabbage and Vegetables - Chinese Cabbage #3

freshly pickled, still vibrant

My MIL loves eating pickles, and so I made this jar of pickles to be served during reunion dinner as an appetizer.

Today's post is going to be short as I can't wait to be on break. LOL.

I used chinese cabbage, red radish, carrots, cucumber and chillies for this pickle. I wanted a pretty colour combination. The red radish's skin lost its pigment after pickling, sadly..but still has a pink hue


Wednesday, January 30, 2013

Chinese Cabbage Rolls in Broth - Chinese Cabbage #2


This idea of doing something like this has been in my head for quite some time after seeing these on Anne's blog.

Finally I got it done and there are some regrets to it. I think my filling needs some changes. It's tender, but a bit too tender for me, it doesn't fall apart, but.. then.. maybe I should just skip the egg, give the mince more workout, because I used frozen mince, which tends to be softer than fresh. But it was well received by my kids and Lydia could eat up one large roll herself and asking for more, LOL.


Monday, January 28, 2013

Chinese Cabbage with Roast Pork and Imitation Abalone - Chinese Cabbage #1


When I saw this recipe long ago… wooah, it looked pretty expensive. Dried scallops are not cheap and so is roast pork. I have sort of forgotten about it until 2 hours before dinner time.

I was surfing the net looking at pictures of cauliflower, but don’t know why this picture of Sonia’s was included in the search. It looked familiar and I clicked it to view it again after so long. Haiya! I have everything on hand. I just took out a big chunk of roast pork to come to room temp thinking of reheating it in the oven later. Then, No no no, no reheating, I’ll be using the roast pork in this dish tonight.


Wednesday, February 8, 2012

Wish-filled Jade Chrysanthemum 有余碧菊 - Vege Blooms # 2


Another auspicious veggie dish for the Lunar New Year. Actually I made this 2 days before the reunion dinner for an ordinary dinner. I didn't have time to do my post and by now.. the dateline to submit to Aspiring Bakers have ended.

Did I fill these with wishes? Hahaha, no. It's fish paste filled, fish-wish, see?
And in Chinese, the word 余(abundance) is always related with 鱼 (fish) because it sounds similiar.

Monday, February 6, 2012

Pearl White Peony 珍珠白牡丹 - Vege Blooms # 1


Actually.. this is just a fancy name for Yuan Xiao Cabbage with Pacific Clams, LOL. It's Chinese New Year, fancy auspicious names jacks up the "feel". Gosh, today's the last day? Happy Chap Goh Mei to all, time flies and the new year is over by midnight.

Pacific clams are nicknamed  "Pearl abalone" and the arrangement seems to resemble the peony, 牡丹花(mao tan far), a beautiful flower that is the unofficial national flower of China. It's a flower that is always seen in Chinese paintings and ancient pretty women are usually related to this flower.

Friday, May 27, 2011

Mustard Green and Oyster Soup - Brassica Trio # 3


Days are hot. I’m boiling herbal drinks almost every day to cool down.

Mustard greens taste bitter. It’s the only bitter veggie that I consume, and not only consume, you can say I’m like crazy for it. I won’t be able to resist any dish with this. Be it the “rubbish vege” that we do with leftover dishes, or the banquet dish of Mustard Greens with Mushrooms, or just a simple stir fry of Mustard Greens, I can never ever resist the sight of it. I must eat and eat a lot of it. I'm insane for it.

When my saw some mustard greens at Tesco, my mind immediately remembered this soup that I’ve bookmarked for a quite a few months. My MIL said, “Won’t this be too cooling if made into soup?”. Well, to me, isn’t it perfect for this crazily hot weather? We definitely need something super cooling.
But then, just in case it’s too “cool”, I left the red dates unseeded. If you want it to be very very cool, then remove the seeds.


Mustard Green Soup
Recipe source: Foodie’s Kitchen

750gm mustard green
400gm pork soup bones or ribs
150gm carrots
20gm/4 dried oysters
4 shitake mushrooms (mine were was big as Marie biscuits when soaked, use more if yours are smaller), soaked
30gm/15 red dates
2L water

1. Bring water to boil.
2. Meanwhile, peel and cut carrots into slanting chunks.
3. Rinse oysters put them into the pot.
4. Score the red dates and put them in
5. Separate each leaf from of the mustard green and wash to remove sand. Separate the petioles(the hard crunchy parts of the leaf) and the soft leaf parts. Cut the petioles into chunks and tear the soft leaf parts into smaller pieces.
6. When water has come to a boil, put in pork ribs and bring back to a boil.
7. Put in mustard petioles and bring to a boil for 10 minutes. Reduce to a simmer for 1hour.
8. Put in soft mustard leaves and bring back to a boil. Simmer for another hour.
9. Season with salt and serve.

Monday, May 23, 2011

Braised Taro with Kai Lan - Brassica Trio #1


Brassicas or Crucifers are a group of vegetables that include stuff like cabbages, choy sum, radish, daikon, mustard, brussels sprouts, cauliflowers and broccoli. Brassicas are good for you as they are high in vitamin C, soluble fibre and contain multiple nutrients and phytochemicals with potential anti-cancer properties. Most of the vegetables we consume are from this family, even Wasabi is.

Kailan is a member of the Brassica family. It has leaves that seem to have a layer of bloom over it. When I was a kid, I was scared to eat it, because I was told by my “smart” brother, that whitish silvery layer contains mercury. Well, up until today, I don’t think I still believe that, but then again, I don’t know how much truth there is to there. Haha!

When I saw this dish on Elin’s, I knew I just got to try this. It’s so special. I think she used the same type of kailan as I did. Or maybe she really did use baby kailans as I can’t really see from the pics. FYI, baby kailans here are really miniature kailan, that really looks like a kailan with long petioles, a stem but in miniature form. The stem is just anywhere 5mm-8mm thick only. But it’s long, up to 6 inches in length. Hong Kong kailan is about the same length, but the stems are fatter and leaves are thicker. But looks wise, similar. Regular kailans can have stems with similar width as Hong Kong Kailans but much larger, up to 1 ft in length. But then again, feel free to use whichever kailan you prefer.


Braised Taro with Kailan
Recipe source: Elin Luv Tidbits

250gm taro (cleaned weight), cut thumbsized
2 Tbsp dried shrimp
2 cloves garlic, finely minced
½ tsp sugar
½ tsp salt
Pepper to taste
2 cups water

500gm Hong Kong Kailan
1 tsp salt
1 Tbsp oil

1. Bring a pot of water to boil.
2. Put in salt and oil. Blanch kalian for 1-2 minutes (I like mine not too cooked)
3. Remove from water and rinse with cold water. Set aside. (Or you can do step 1-3 while you braise the taro, if you have more than one available stove)
4. In a wok, heat up and put in 2 tbsp of cooking oil.
5. Put in garlic and dried shrimp and fry until fragrant.
6. Put in taro and cook for 1 minute. Put in water and simmer on medium low heat until taro turns soft and the gravy looks creamy. (Remember to check water once a while)
7. Put in salt, sugar and pepper.
8. Return blanched kailan to wok and toss it around. Cook until the kalian warms up again.
9. Dish up and serve.

*It's a bit sad that my taro is not that creamy, no matter how long I braise it. Buying taro is sometimes like buying lottery. Haha. Even Thai taro may not give me favourable results each time. But the overall dish is indeed nice.

Thursday, February 17, 2011

Potato Savoy Cabbage Soup - Soup Week #4


I bought this half head of savoy cabbage at Jaya Grocer and I had no idea what to do with it. As always whenever I see something new, I just buy it first, think later.

Savoy cabbages look very pretty, with lacy leaves and it comes nicely green unlike the regular cabbages. Since I’ve never eaten savoy cabbages before, I had no idea how it taste like. So, I better google for a recipe. I don’t want stir fries or salads. Nor do I want to do meat rolls with it, since it’s only a half head, the leaves will not be suitable. Then I saw a recipe on BBC Good Food, savoy cabbage soup with potatoes, sounds yummy and topped with crispy bacon!!!


Here’s my first attempt, cooking with savoy cabbage.
If you’re thinking of serving this as a side dish, maybe you’d like to think twice. It’s so hearty that it can be a meal on its own. This portion is enough to feed 4 adults.

Potato and Savoy Cabbage Soup
Recipe loosely adapted from BBC Good Food

150gm leeks (Try not to use China leeks)
200gm onions (I used yellow ones)
600gm floury potatoes (russet)
75gm carrots
500gm savoy cabbage
2 Tbsp olive oil
100gm bacon (bacon chips does it well, no need to splurge on rashers)
½ French loaf
Some butter (I used 2 heaped Tbsp initially, adding more as I toast the cubes on the pan)

1. Peel and thinly slice leeks, onions, potatoes and carrots
2. Heat up a pot and put in olive oil. Put in onions and leeks and cook until it softens and takes on a little bit of goldenness.
3. Put in sliced potatoes and carrots, stir and put in 8 cups of water.
4. Let it simmer for 15 minutes or until carrots are tender. Season with salt or throw in a chicken bouillon cube or 2.
5. Let it cool down for a while and whizz with a immersion blender until fine and smooth. (if using a regular blender, please leave it to cool down until slightly warm.
6. While waiting, prepare your croutons. Cube French loaf and heat a pan. Put in some butter and when it has melted, put in your cubed bread and toss it around to coat well. Put in more butter if you find it not sufficient. Slowly toast them on your pan until very golden and crispy.
7. Prepare bacon chips by frying in a little bit of oilon medium low heat until golden and crispy, dish up and drain off the oil on absorbent papers.
8. When it’s almost time to serve, reboil soup and put in sliced savoy cabbage and simmer for 5 minutes.
9. Ladle soup into bowl and top with crispy bacon chips and croutons.


Verdict:
Gosh , this soup is very delicious. Do not be fooled by how it looks, yellow and dirty looking. The bacon can be skipped, but don’t forget the croutons. Maybe I’m used to drinking western soups laced with loads of cream and when this one doesn’t, the butter from the croutons adds the “milky” smell that I will usually relate with western soups. My hubby and kids loved this and all were full from just having the soup.


Wednesday, February 16, 2011

Dried And Fresh Bok Choy Soup - Soup Week #3


I’ve seen a TVB documentary on food, and the host was treated to a dried and fresh bokchoy soup. But her soup looked milky and white instead of mine looking so clear, hahahaha.

Actually I didn’t know what was in the soup so I just threw in whatever I think might make the soup nice. But it doesn’t look like what I saw on TV. Was it that the soup was boiled with pork lungs? I forgot, but here’s soup for you to try if you like “choy gon tong”


Dried and Fresh Bok Choy Soup
Recipe Source: Wendyywy

50gm dried Bok Choy
400gm fresh Bok Choy
1 large carrot
¼ of a foot long dried octopus
250gm pork loin or 300gm pork ribs
2.5L water
Salt and pepper to taste

1. Soak dried bok choy until it softens and cut into 2 inch lengths.
2. Peel and cut carrot into slanting chunks, rinse and snip octopus into 1 inch slices
3. Boil water and put in carrots, octopus, dried bok choy and pork.
4. Boil for 2 hours.
5. Wash and cut fresh bok choy into 2 inch lengths.
6. Put fresh bok choy into the soup and boil for 30 minutes
7. Season with salt and pepper.

Wednesday, December 22, 2010

Stir Fried Red Cabbage with Apples


I did another version or red cabbage with apples, and this time, no wine, no jam, which makes this more economical. And if you are thinking of what to serve for your Christmas dinner together with your main dish, this can be considered.

Frankly I prefer this version. Taste wise and cooking time. This version is a lot faster and easier.
And I retained the crunch in it. All it took was just 15 minutes from preparation to finish cooking, compared to almost an hour for the previous recipe.

Stir Fried Red Cabbage with Apples.
Recipe Source: Wendyywy
Serves 4-6.

550-600gm red cabbage, rinsed and thinly sliced
2 small green apples, peeled, julienned (comes to about 1 heaped cup)
1 small red onion, sliced
1 Tbsp olive oil or cooking oil
1 Tbsp apple cider vinegar
1 Tbsp Worcestershire sauce
¾ tsp salt and some black pepper
1 ½ Tbsp brown sugar or more
20gm butter (1 heaped Tbsp)

1. Heat a heavy based pot(wok will be fine too, but make sure you have a lid) on medium heat and put in oil. Cook onions until soft and translucent.
2. Put in apples and stir. Cook for about 30 seconds. Turn heat to high
3. Then put in sliced red cabbage. Immediately put in vinegar and Worcestershire sauce. Then stir.
4. Make sure everything is well mixed, cook for about 1-2 minutes until you see the cabbage start to wilt. Put on the lid and turn heat to low. The cabbage will sweat and there is no need of adding water.
5. Stir it from time to time and replace lid. Let it cook until desired level of texture:-, crunchy and wilted, or soft.
6. Then turn heat to high and put in salt, pepper and sugar and butter. Cook until butter has melted. Turn off heat and transfer to plate to serve.

Thursday, November 25, 2010

Hakka Thunder Tea Rice


Healthy!!!! This is healthy food. Loaded with loads of greens and drenched in green soup too. How much greener can you get?

Hakka Thunder Tea rice or Hakka Lui Cha, is a traditional fare among the Hor Poh clan which is part of the Hakkas. But it’s no longer confined to those of that clan, but anyone, everyone who loves to eat lots of green and adores aromatic herbs like mint and basil.


I’ve never planned to make or even try this, but suddenly I just felt like making it with basil and mint already on hand, what was I waiting for? I only needed the wait for the next day to make this for lunch for everybody at Mike’s shop. It was past dinner time when I thought of it.

Currently one bowl of this can be anywhere between RM3-RM8, depending on where you eat this.
Making this yourself is a lot cheaper and you can have as much tea soup as you like : )

You may think that preparing this is tedious. But actually after trying this, it’s not too hard. One hour was all I took. But you must really go according to sequence to save work on washing and waiting.
One pot
One pan
One blender
Was all that I used, with no washing in between. So, it’s not that tedious, but you have to prepare quite a few bowls or plates to separate the condiments.


Hakka Thunder Tea Rice /Hakka Lui Cha recipe
Recipe Source : Wendyywy
Serves 5-6

Condiments
120gm preserved chopped salted radish (choy poh), soaked in water for 30 minutes, squeeze dry
30gm dried shrimps, soaked in water for 15 mins, drained and coarsely chop
250-300gm choysum/bak choy
250-300gm cabbage/spinach/kalian
10 pcs of long beans
2 pieces (3 inch square) pressed tofu, cut into 1 cm cubes
2 onions or leeks, sliced
5 Tbsp toasted peanuts
2 tbsp sesame seeds (half for paste, half for sprinkling on rice)


Tea soup paste
1 handful of Thai basil 九程塔, leaves only (before trimming from stalks was 45gm)
1 handful of mint (applemint, 香花菜, leaves only (amount about the same as basil)
3 Tbsp roasted peanuts
1 Tbsp toasted sesame seeds (amount taken from above)
1 green tea bag (snipped open for the tea dust/leaves)
½ tsp salt, more if you like it saltier
1 anchovy soup cube (replace with vegetarian seasoning if vegetarian)
½ cup drinkable plain water (or the water squeezed from the blanched, cut, veggies)


Method
1. First, cook your rice, prepare only 70% of what you would normally eat.
2. Soak the preserved radish and dried shrimp in water, separately.
3. Bring a pot of water to boil, it should be enough for blanching the vegetables.
4. Meanwhile, cube the tofu, slice the onions/leeks. Rinse the vege, leave them whole.
5. When the water has come to a boil, blanch the vege separately. Long beans for 30 seconds, choysum/bakchoy/kalian for 30 seconds, Spinach until just wilted, cabbage for 1-2 minutes. Drain all vege and leave to cool down.
6. Now, squeeze dry the preserved radish and the soaked shrimps. Coarsely chop the shrimps.
7. Prepare a pan. Put sesame seeds in and put on medium low heat. Gently toast them until slightly golden, or sometimes they may start jumping (some don’t jump, but will just turn golden). Remove and set aside.
8. Put in 2 tbsp of oil and pan fry half the tofu cubes until golden. Drain and dish up. Repeat with the other half of tofu.
9. With oil remaining in pan, turn heat to high, let pan heat up and put in sliced onions/leeks and cook for 30 seconds and turn to medium heat and cook until soft and translucent. (The initial high heat is needed to give the onions a nice aroma). Lightly season with some salt. Remove onions/leeks and put in a bowl/plate
10. With the same pan, if there is still some oil (1tsp), if there is none , then add some oil in, then fry the dried shrimps until golden. Dish up.
11. Put in preserved radish and cook for 1 minute until it turns hot. Dish up.
12. Now, slice all the vegetables thinly and keep them aside. Squeeze excess water out fom leafy vege. (You can retain the squeezed out juice for blending the paste)Do not mix them together.

To prepare tea soup paste
1. Put everything in to a blender and whizz until fine.
2. Put into a bowl.

Assembly
1. Place rice in center or bowl (I only fill 70% of my normal portion)
2. Divide all condiments into 5 portions and arrange condiments onto rice.
3. Put 2 Tbsp of tea soup paste into another rice bowl. Pour 1 cup boiling water onto paste and let it infuse for 1 minute.
4. You can either consume the rice and soup separately or pour the soup onto the rice.


I wonder if you realised that the bowls of rice actually looked different. I actually made this rice twice before posting, with different veggie each time. I super love this and the man super hates this, ahahhaha!!!  I had to cook him fried rice with all the leftovers of condiments after placing out all the portions.

Pics from my 2nd attempt:


Wednesday, November 17, 2010

Malay Style Stir Fried Chayote Shoots with Dried Anchovies


I’ve seen on Sonia’s blog, she cooked this. And it has been long since I’ve eaten this.
I can easily get Chayote shoots at Ipoh’s Jusco, unlike in Klang Valley where it is hard to find.
Oh, if you think these are the same as pumpkin shoots, no they are not. In Chinese, these are called 龙须菜 ("loong sou choy" in Cantonese)


Now, let me tell you the difference,
Pumpkin shoots are hairy and big, whereas chayote leaves are smaller and smooth.
Chayote shoots taste better, if you ask me, I’ve eaten pumpkin shoots countless times cos our Malay friends like to put in pumpkin leaves when they cook their pumpkin in coconut milk (labu masak lemak).

So, how does one prepare these?
Soak chayote shoots in clean water for 10 minutes and shake off the water. Just pluck 2 inch segments starting from the top (pluck the tendrils to suitable lengths) until it feels tough. You will know if it’s tough if it needs extra effort to pluck. Discard the rough bits. Do not wash the plucked vegetables after this. No matter what vegetables they are, wash before you cut or pluck and not after, so that you will not wash away the nutrients.


So, here’s my rendition of stir fried chayote leaves , done in Malay style of stir fry.

Malay Style Stir Fried Chayote Shoots with Dried Anchovies
Recipe source: Wendyywy
Inspired by Sonia and my Malay friends
500gm chayote shoots
1 red chilli
½ onion, sliced
2 cloves garlic, peeled and lightly smashed, or just slice it
2 Tbsp dried anchovies (ikan bilis), rinsed
1 cup water
½ tsp salt

1. Heat wok and put in 2 Tbsp cooking oil. Put in garlic and sliced onions and cook until garlic is slightly golden and fragrant.
2. Put in chilli and dried anchovies. Fry for a while until the anchovies smell good.
3. Put in chayote leaves and toss. When the chayote leaves look slightly wilted, put in water.
4. Cook for 1-2 minutes and season with salt. Dish up.

Wednesday, November 3, 2010

Brussels Sprouts with Fermented Beancurd


Malaysians call this “Choy Darm”, JB folks and Singaporeans call this baby kai lan as seen in this blog and this blog and many other blogs

Is this really kai lan?

Nope. It’s Brussels sprouts. Surprised???

It was during my 2nd year in Uni, when I took a paper on Olericulture and my lecturer had a session with us on local vegetable classification, and she told us that this is Brussels sprouts. I then asked her why is it not round and tight. She told me, it’s due to the weather. When the temperature is not cold enough, even our cabbages will not have tight heads. And Brussels sprouts grow below 24C, being the best at 15-18C, hahah, what do you think the temperature in Cameron Highland is??? Of course the Brussels sprouts won’t have tight heads. Not long after that session, she brought us up to Camerons for a field trip, and yeah, I saw them, sprouting from the sides of the stem at MardiPark in Tanah Rata. Yes, they don’t grow upright, but they sprout from the “armpits” of the main plant’s leaves. One plant can yield lots and lots of Brussels sprouts. And one just pluck the sprouts and let the main plant live and grow.


Lately the local brussels sprouts have rounder and tighter heads, maybe they got a new variety that was modified for higher temperatures. And the new ones were no longer as green as before as well.
You can just peel off the leaves one by one, and if they are too tight, just slice the head for stir fries.

Today, I don’t want to do the usual garlic stir fry with this, but I want to fry this with “Foo Yue”, a fermented beancurd.


200gm brussel sprouts
2 cloves garlic, smashed
1 red chili, sliced
4 cubes preserved beancurd (white type)
1 tsp sugar
Pinch of salt
½ tsp cornstarch + ¼ cup water

1. Wash, peel or slice brussels sprouts.
2. Heat a wok on high heat, put in 2 Tbsp of oil, turn to medium heat.
3. Put in smashed garlic and fry until slightly golden and put in chili and preserved beancurd.
4. Mash perserved beancurd with spatula and fry until fragrant.
5. Put in sugar.Turn heat to high and put in brussels sprouts.
6. Toss everything, and put some water if too dry, but only put them on the sides of the wok, not directly onto the sprouts. Cook for about 1 minute.
7. Taste, if not salty enough, add some salt. Thicken with some cornstarch mixture.
8. Dish up and serve.

***Do not overcook brussels sprouts, as they may release a sulfurous smell.

Tuesday, September 28, 2010

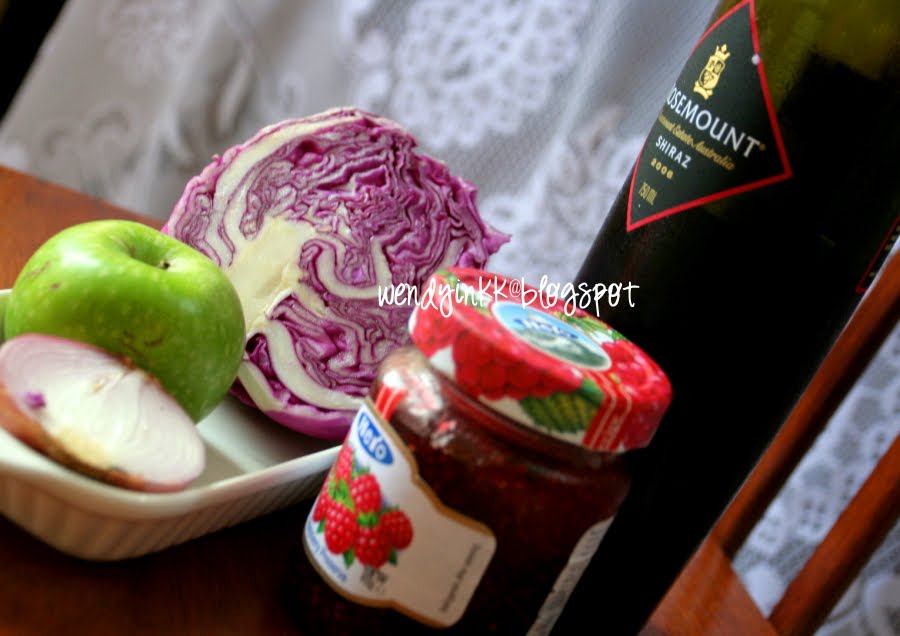
Braised Red Cabbage with Apple and Red Wine


I bought some red cabbage and I want to find new ways to cook it besides salad or simple garlic stir fry.
So, I think there might be some braised cabbage stuff online and searched. Indeed, there are many braised cabbage recipes, even Jamie Oliver has one, but I don’t have bacon , so I can’t use his.

Then I saw this recipe. Ok, it sure does look interesting, and I have jam, wine, apples… Ok, all set. I adapted the recipe with some changes. I didn’t use any spices at all, because I’m afraid Mike won’t like it. And I reduced the sourness and therefore had to reduce the jam used. Overall, it’s still quite similar. You may try the original recipe if you like spices.

Braised Red Cabbage with Apple Recipe

300gm red cabbage, sliced
1 medium sized green apple (about 110gm), peeled and grated. Discard core after finished grating
Half red onion, peeled and sliced
1 Tbsp butter
1 Tbsp rice vinegar (I reduce a lot of this, because Mike doesn’t like anything sour. But this is essential to retain the colour of the cabbage)
2 level Tbsp raspberry jam (best is lingonberry jam or red currant jam)
80ml or 1/3 cup red wine
1/3 tsp salt and pepper to taste
another 1 Tbsp butter (to be used at the end of cooking)

1. Put onions and butter into a saucepan and cook until onion softens.
2. Put in sliced cabbage and grated apple. Immediately put in vinegar, then only stir.
3. Put in raspberry jam, red wine, salt and pepper to taste. Stir until well combined. Bring to a boil.
4. Put lid on and simmer for 30 minutes (time is much shorter due to much lesser amount)
5. Stir in butter and turn off the heat.


After doing seeing the recipe, I did some reading online and found that the red pigment in red cabbages can be used as a PH indicator. Just incase you do not know what is a PH indicator, it means, the colour can detect whether the solution it is in is acidic or alkaline. It turns bluish green in alkaline and reddish when in acid. Which is why you must put in the vinegar as soon as possible after you have put the cabbage into the pot.

Read :
Red cabbage contains a pigment molecule called flavin (an anthocyanin). This water-soluble pigment is also found in apple skin, plums, poppies, cornflowers, and grapes. Very acidic solutions will turn anthocyanin a red color. Neutral solutions result in a purplish color. Basic solutions appear in greenish-yellow. Therefore, it is possible to determine the pH of a solution based on the color it turns the anthocyanin pigments in red cabbage juice .
Adapted from here

The braised cabbage is really nice to eat. The alcoholic smell of the wine is no longer there after braising. The smell of the jam is really nice and it really marries well with the vinegar. The cabbage is not too mushy. It still has a crunch to it because of the vinegar. This tasted like something I had in Shangrila Hotel, Kuala Lumpur. The international buffet serves some German roast beef and had some cabbage served with it, but it’s not red cabbage, just the usual cabbage, but it sure was almost like this, sourish, sweet and fragrant. Nope, it’s not sauerkraut as that is salty. I think this is called Blaukraut or Rotkohl in German.

A fresh change to the usual salads or Chinese stir fries. I do recommend you try this out if you like sweet and sour stuff.

And a reminder to do all measurements with measuring spoon, just incase you used the rice eating spoon. Because 1 rice spoon of vinegar is much much lesser compared to if you heaped the jam with the same spoon.

Thursday, September 23, 2010

Goji Soup with Salted Duck Egg


We are familiar with goji berries or wolfberries. But do you know that the Gau Gei soup are made with the leaves of the goji berry plant? It’s just that the goji plant flowers but never fruits here.

Goji plants are very easy to plant. You can just use the stems of the ones you bought. After you’ve taken off the leaves for the soup, tuck that stem into some soil, in a area with good light, water it twice a day, and later on you’ll have goji leaves sprouting out. Give it more time, and then it’ll grow into a bush. My mom did that once, but it didn’t take long for us to eat off the plant : ) We were consuming faster than it could grow.

When I was 13, I did marketing for mom. Everyday she’ll tell me what to buy and which stall to go to. And 2 months after that, she no longer told me what to buy and I’ll decide by myself. One day, I bought these goji stalks and the lady who sold me them told me, the soup is best made with salted egg, not regular chicken eggs.

So now, may I present to you Goji Soup with salted duck egg.


180gm goji stalks (pluck only the leaves, discard the stems) Caution: Stems are thorny
1 salted egg (break the egg into a bowl, cut the yolk into small pieces, put the yolk back into the whites)
1 Tbsp wolfberries/goji berries
1/3 cup dried anchovies, rinsed
1 tsp oil
1L water
Salt to taste

1. Put anchovies into saucepan/wok and put in oil. Let it fry for a while. Put in water and bring to a boil. Lower the heat and let it simmer for 5 minutes.
2. Strain the anchovy stock. Return stock to pot. (You can skip step 1 and 2 if you prefer to use stock cubes)
3. Bring stock to a boil, with a ladle in one hand and the salted egg in another hand, pour the salted egg into the pot with the other hand stirring so that the egg will not clump together.
4. Now, taste the soup. If it’s not salty enough, add in salt. Do not season before the salted egg, because you won’t know how salty the egg will be.
5. Put in goji berries. Then the goji leaves. Stir and bring back to a boil.
6. Remove from heat and ladle into bowl to serve.


I wonder how do you clean those dirty looking salted duck eggs? Rinse the while thing under running water??? Or just rub it off with bare hands??? I always rub off the dirt before washing in a "wanted to throw away" plastic bag. And If you have a garden, rinse the egg there, so that the dirt won't clog your sink.


Tuesday, August 10, 2010

Cabbage Veggie Rolls


When I was still a fresh graduate, I stayed with my chummies in a rented apartment. We always cook and have meals together. And they complained about their waistline when I stayed with them. Hahaha!!! Everybody who stays with me does!!

One late afternoon, I just went about shopping at the nearest hypermarket, Giant. Suddenly I felt like making cabbage rolls. So I just bought a small jicama, a small carrot and a bit of this and that. When I got home, I felt like in putting in this and that.. and lucky Wai Wai came home. She said, woah, what are you doing.. and hehehe, we had the best meal in the house (everybody else was out) Just these rolls, and the both of us were so full.


Cabbage Veggie Rolls Recipe
1 round cabbage , about 800gm
350gm jicama (sengkuang), unpeeled weight
1 small carrot
1 palm sized wood ear fungus, soaked size
1 chinese sausage, peeled (omit if you’re vegan, it’s ok) 2 shallots
2/3 tsp Salt and pepper to taste.
(Actually I used to put in egg shreds too, feel free to use that as well)

1. Cut and dig stem from cabbage. Place in a pot of water, stem side down, and boil for 10 minutes or until soft and pliable. (the cabbage should still yield some crunch, but pliable)
2. Remove cabbage from pot and let it cool. Peel cabbage, leaf by leaf, taking care not to break them. If it’s not soft enough, return to pot and boil again. When the leaves seem too small for wrapping purposes, slice them finely and squeeze them dry.
3. While waiting for the cabbage to cook and cool down, cut jicama, carrot, wood ear fungus, Chinese sausage into matchstick sizes.
4. Slice shallots.
5. Heat a wok and put in 3 Tbsp cooking oil.
6. On medium heat, fry shallots until golden and crispy. Drain and dish up.
7. With oil still on wok, on medium low heat fry Chinese sausage until golden. Drain and dish up.
8. Turn heat to high and fry jicama, carrots and wood ear fungus until wilted and rather dry. Put in shredded cabbage and toss until dry again, just make sure there is no visible juice at bottom of wok. Season with salt and pepper.
9. Dish up and leave to cool.
10. To wrap: Place one piece of cabbage, curve side up, snip away the hard end with scissors. Place some of the veggie fiiling onto cabbage. Top with some fried sausages and fried shallots.
11. Fold both sides in and roll cabbage tightly.
12. Repeat until either all fillings or cabbage is used up.

And I have nothing in excess this time, all nicely used up
Mike needs chili sauce to go with this, but I just eat them as they are, I love these, so did Wai Wai, 9 years ago.


Printfriendly

Related Posts Plugin for WordPress, Blogger...